Quickstart
This guide will get you all set up and ready to use the Akedly API. We'll cover how to get started using one of your API pipelines and how to make your first API request. We'll also look at where to go next to find all the information you need to take full advantage of our powerful REST API.
Before we are able to create an API pipeline, a few things need to be set up. Including your company profile, your API key, and the pipeline itself. This guide will cover these steps.
Setup your company profile
Before starting off with anything, you need to let your own customers know who you are. This can be done by setting up your company profile. This is a one-time setup, and you can always change the information later. You set up your company profile in the Company Profile section of the dashboard.

Company name
This is the name of your company. This will be shown to your customers when they are asked to authenticate.
Company Website
This is the URL of your company's website. This will be shown to your customers when they are asked to authenticate. There's also a planner update to re-direct them to your website in case they request any help.
Company Cover
This is the logo of your company. This will be shown to your customers when they are asked to authenticate. The cover should be a PNG or JPG file with a minimum size of 1200x630 pixels. The recommended size is 1920x1080 pixels.
The company's cover photo will only be shown to the customer in case you decide to use our GUI authentication gateway. More on that in the GUI Authentication Gateway section of the documentation.
API Key & Where to Find It
To authenticate your API requests, you need to use an API key. This is a unique identifier that allows you to access the API and perform actions on behalf of your account.
You can find your API key in the "View API Key" button of the dashboard.

Copy your API Key in a safe place, as you will need it to send your API requests.
Make sure to keep your API key secret and never share it with anyone. If you think your API key has been compromised, you can contact us to revoke it and generate a new one.
Setup Your First API Pipeline
An API pipeline is basically the roadmap of your API request. It contains all the endpoints of your ready webhooks that our server will ping upon a successful or a failed authentication request.
You can create a new API pipeline in the "Pipelines" section of the dashboard. It can also contain a redirection for your user if you'd like to send them to a specific page after they authenticate.
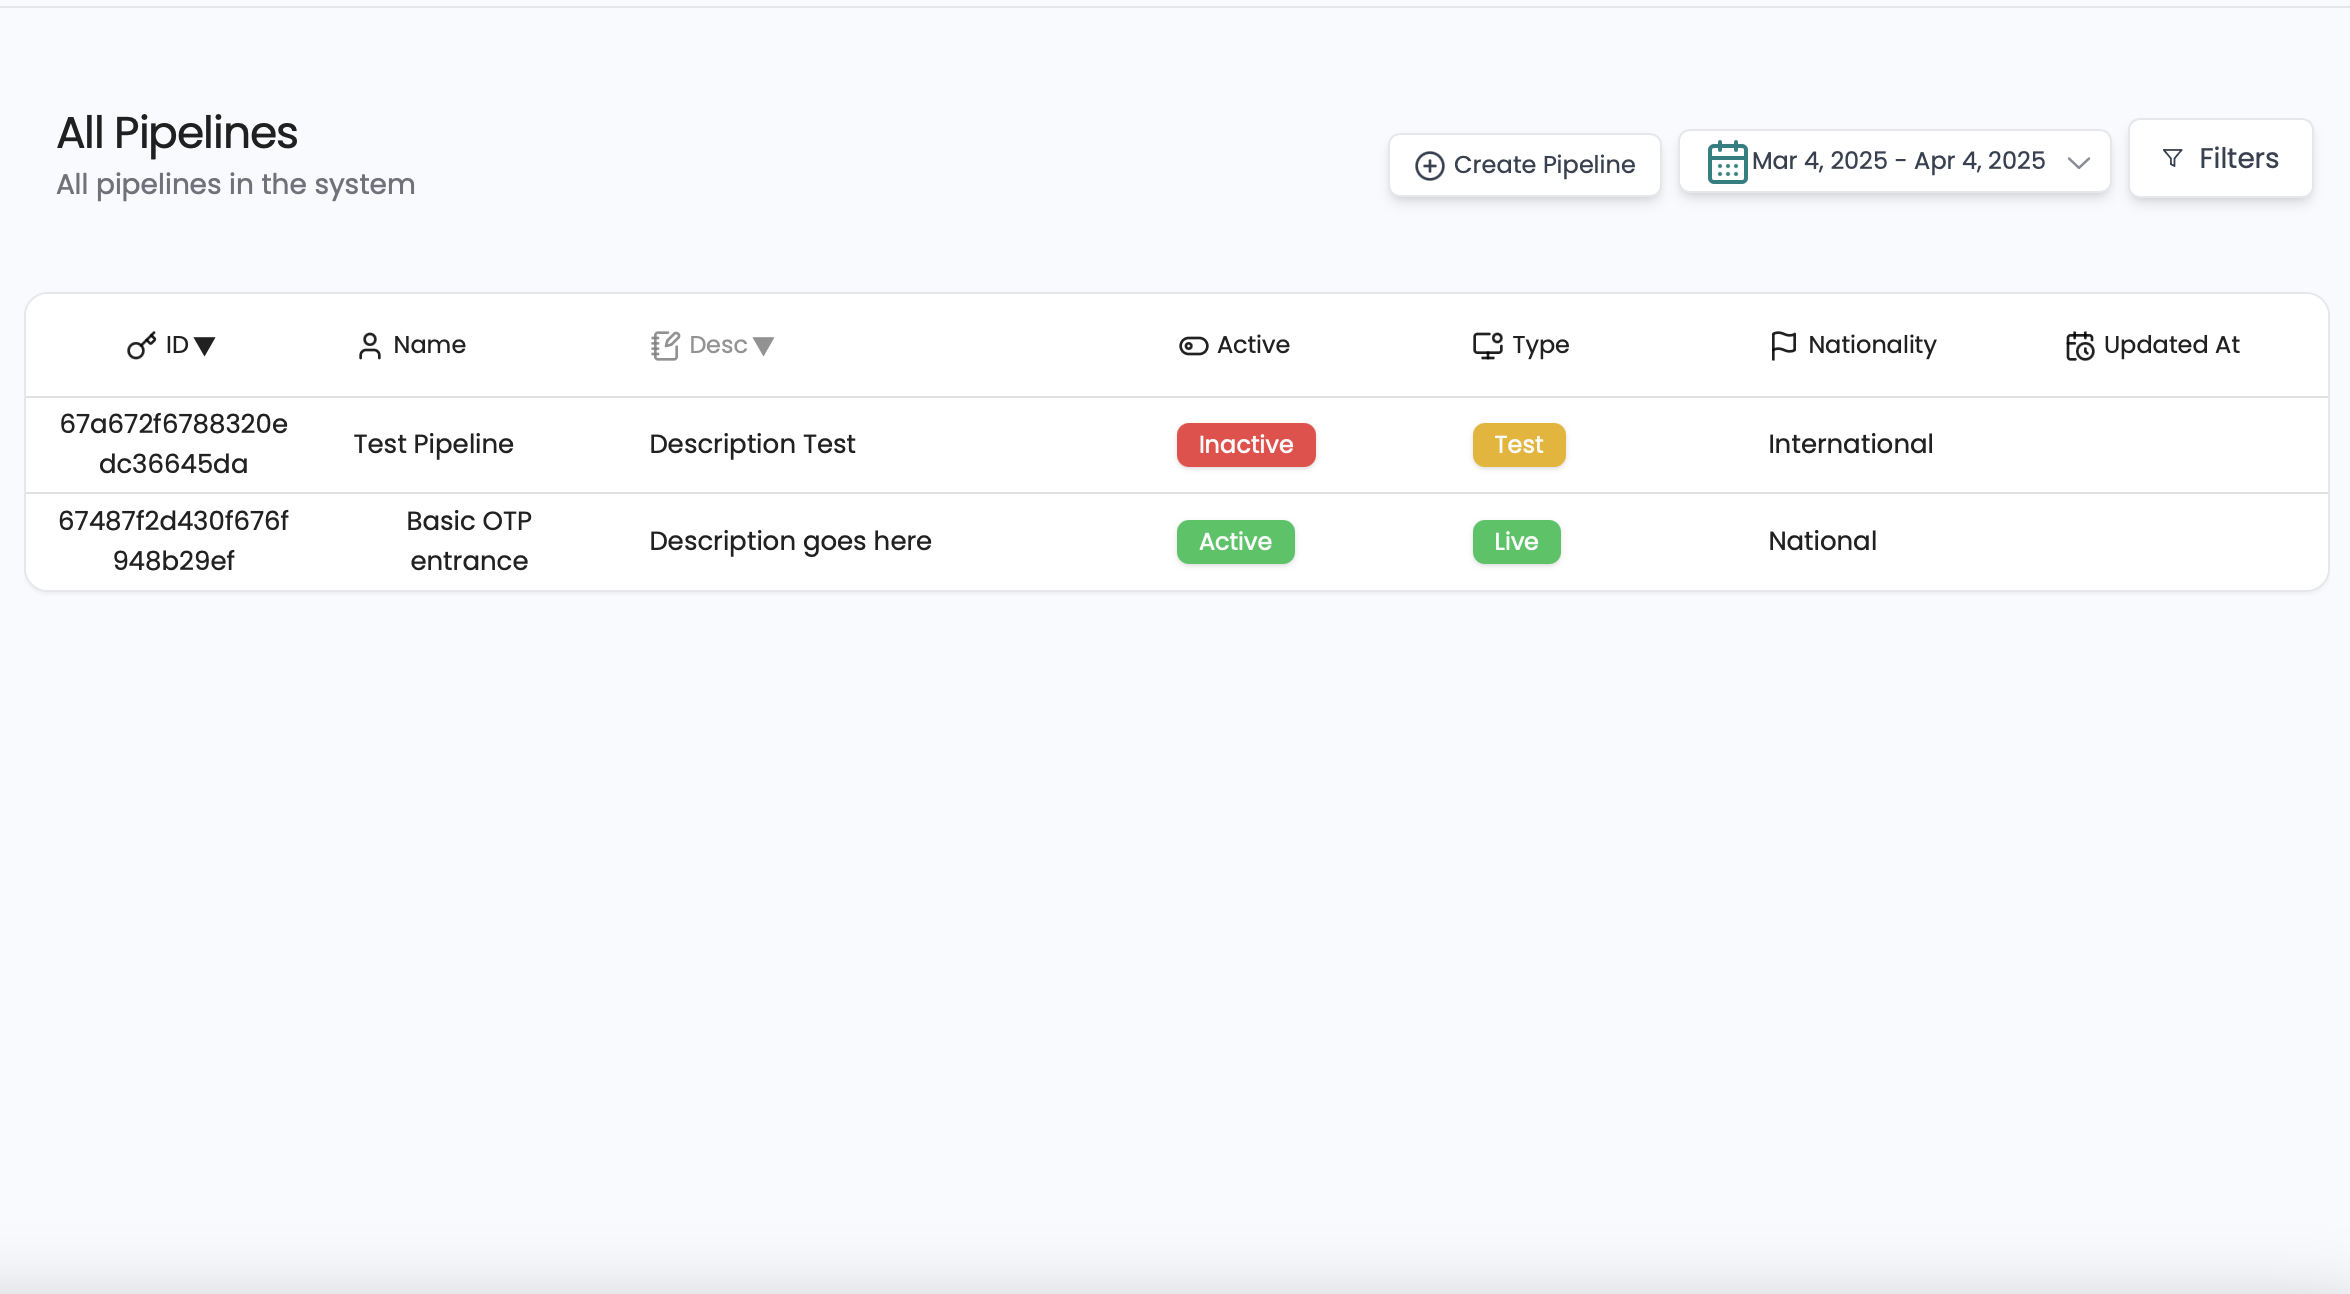
Create a new API pipeline
To create a new API pipeline, click on the "Create Pipeline" button in the "Pipelines" section of the dashboard. This will open a form where you can enter the details of your new pipeline.
- Pipeline Name: This is the name of your pipeline. It can be anything you want, but it's a good idea to choose a name that describes what the pipeline does.
- Pipeline Description: This is a short description of your pipeline. This is optional, but it can be helpful to have a description to remind you what the pipeline does.
Once the pipeline is created, you can press on the created pipeline to go into further details.
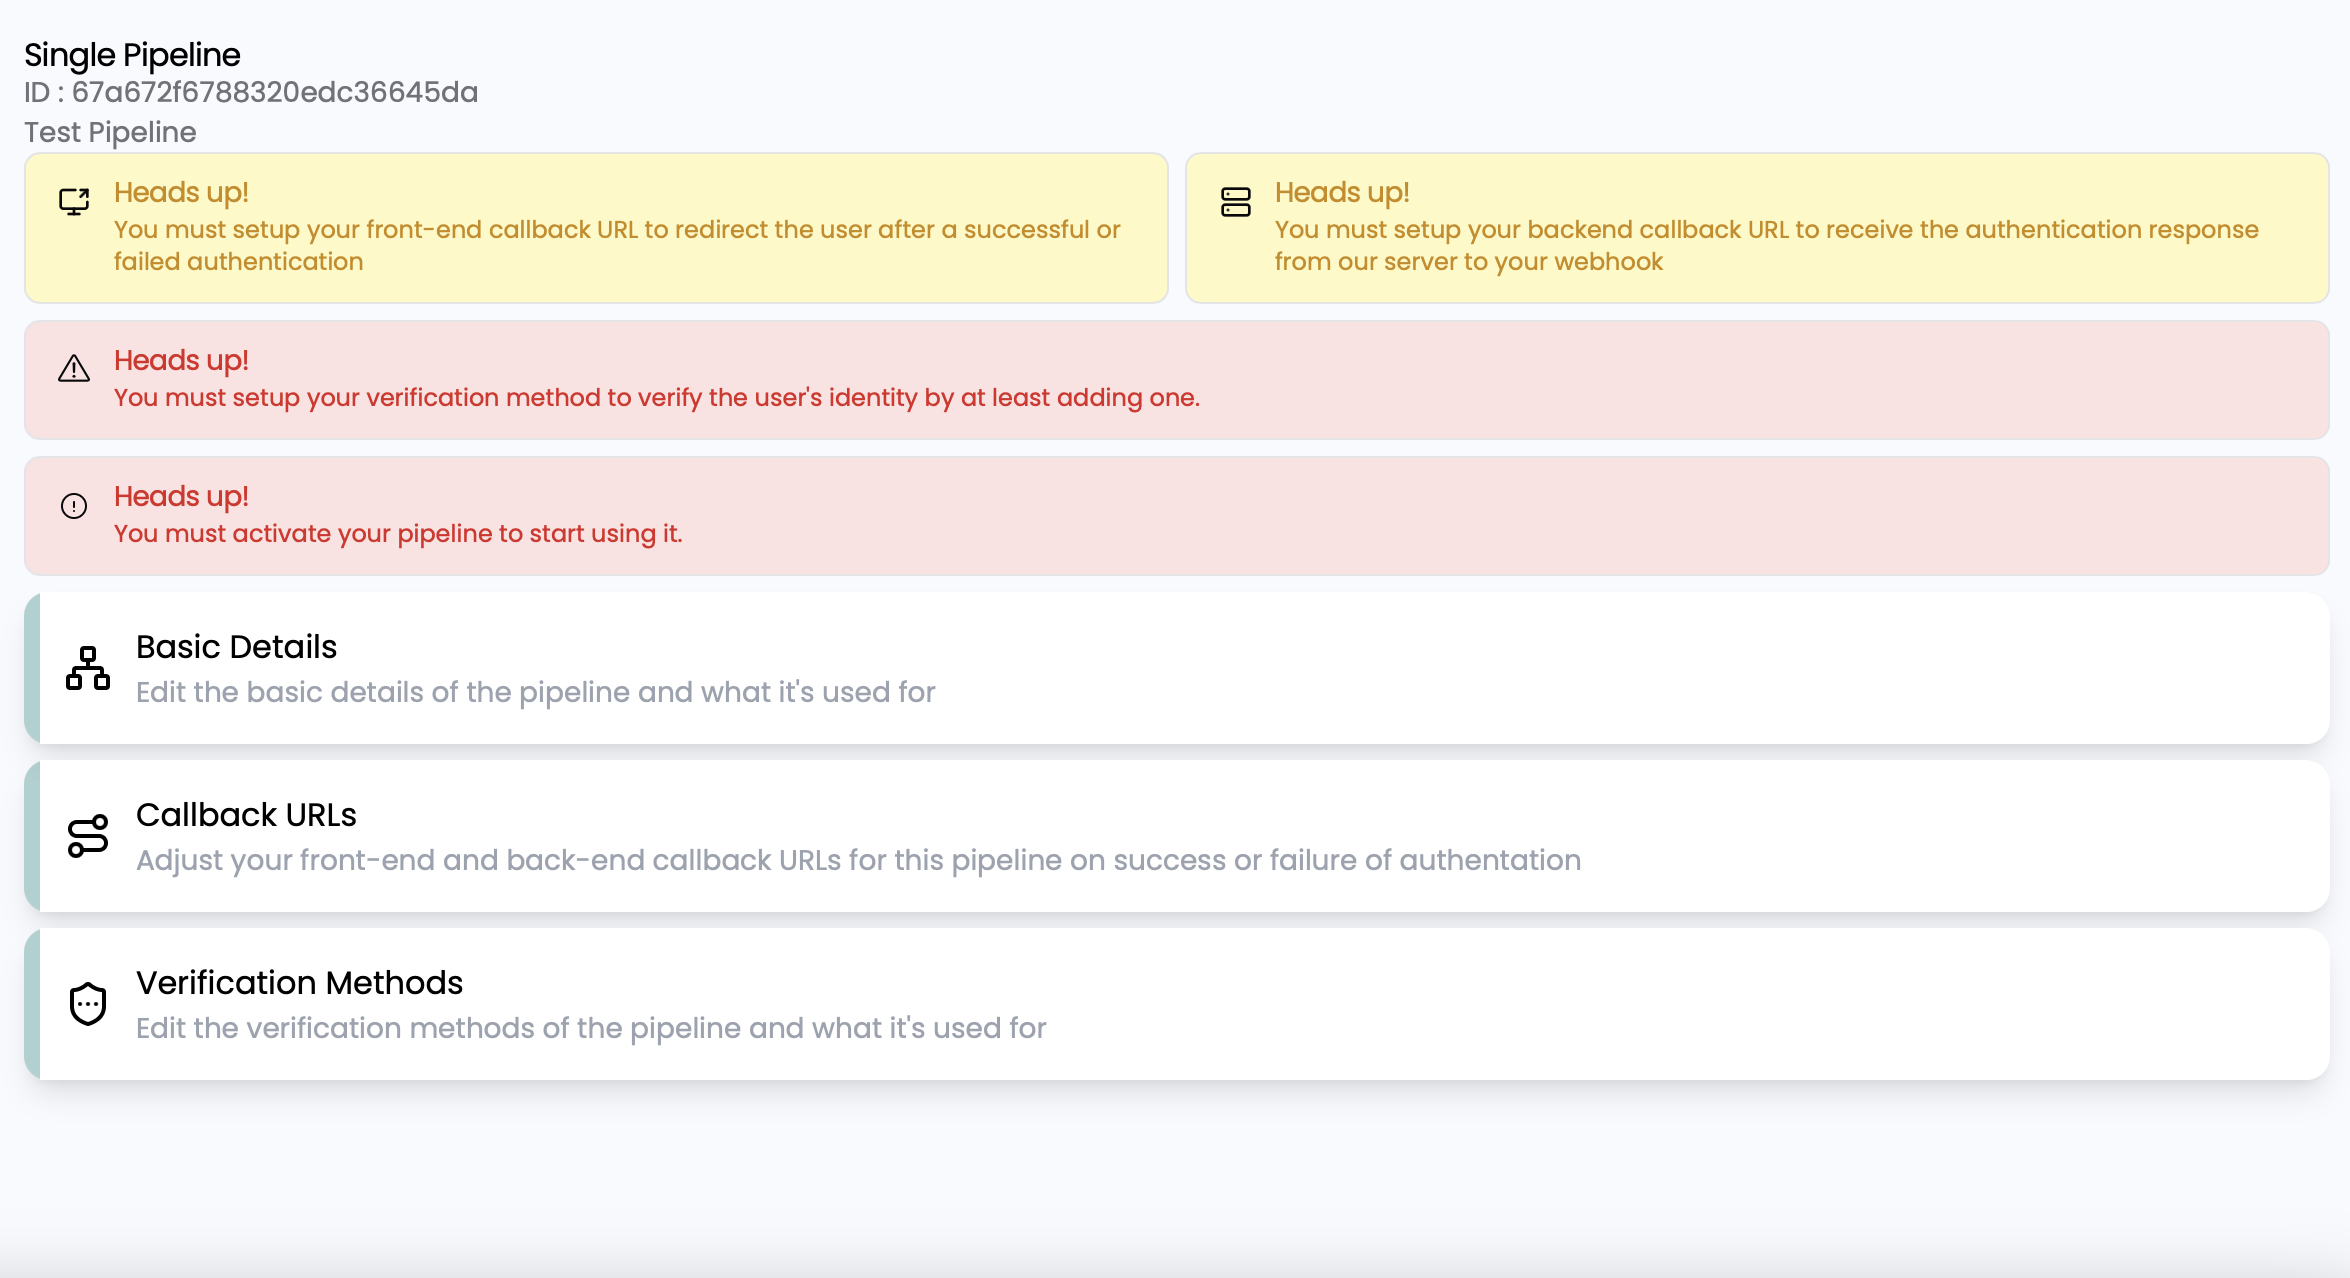
Basic Details
- Pipeline ID: This is the unique identifier of your pipeline. You can use this ID to reference your pipeline in your API requests.
- Pipeline Name: This is the name of your pipeline. It can be anything you want, but it's a good idea to choose a name that describes what the pipeline does.
- Pipeline Description: This is a short description of your pipeline. This is optional, but it can be helpful to have a description to remind you what the pipeline does.
- Active: This is a toggle that allows you to activate or deactivate your pipeline. If the pipeline is deactivated, it will not be used when a user tries to authenticate. MAKE SURE TO TURN THIS ON.
- Type : This is the type of the pipeline, live or test. If you are testing your pipeline, you can set it to test. This will allow you to test the pipeline without affecting your live data. If you are ready to go live, set it to live.
Callback URLs
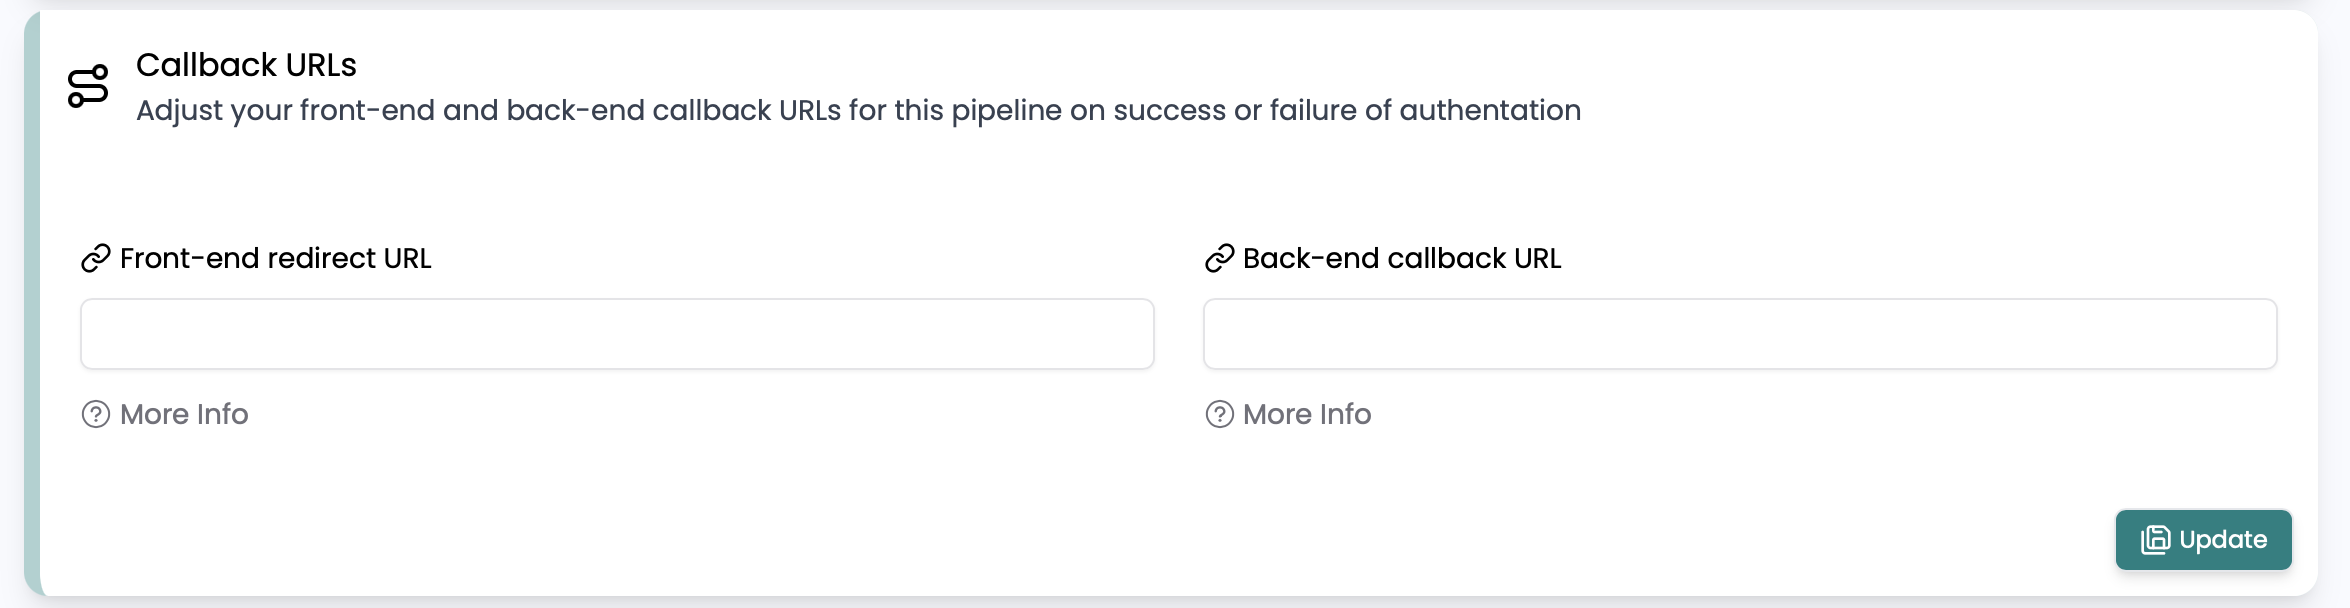
- Front-end Redirect URL: This is the URL that the user will be redirected to after they authenticate. This is not required, but it can be helpful to have a redirect URL to send the user to a specific page after they authenticate.
- Back-end Callback URL: This is the URL that our server will ping when a user authenticates either successfully or not. This is required, and you need to set this up to receive the authentication data. It will send you a POST request with a payload containing the authentication data. You can use this data to log the authentication process.
The front-end redirect URL will only be used if you are using our GUI authentication gateway.
Don't forget to activate your pipeline after you create it. You can do this by toggling the "Active" switch in the pipeline details.
What's next?
Now that you have your API pipeline set up, you can start making API requests. You can use any programming language to make API requests.
Choose Your Authentication Method:
- Standard API Authentication (10 minutes) - Traditional SMS/Email OTP delivery
- 🆓 Opt-in WhatsApp Authentication (15 minutes) - Cost-effective WhatsApp OTP with automatic SMS fallback. FREE for Egyptian startups until end of 2025!
New to Akedly? We recommend starting with the Opt-in WhatsApp Authentication method as it's more cost-effective and provides a better user experience. It requires the same company profile and pipeline setup you just completed.